This post contains affiliate links. If you use these links to buy something, we may earn a commission. Thanks.
One of the biggest challenges we’ve faced while upgrading the Spyglass Farmhouse is being smart about where we spend our money. The house is gorgeous as is, and the previous owners invested a significant amount of money in the construction of it (hello, $4k front door), so we won’t be knocking down any walls, but it can certainly use a refresh.
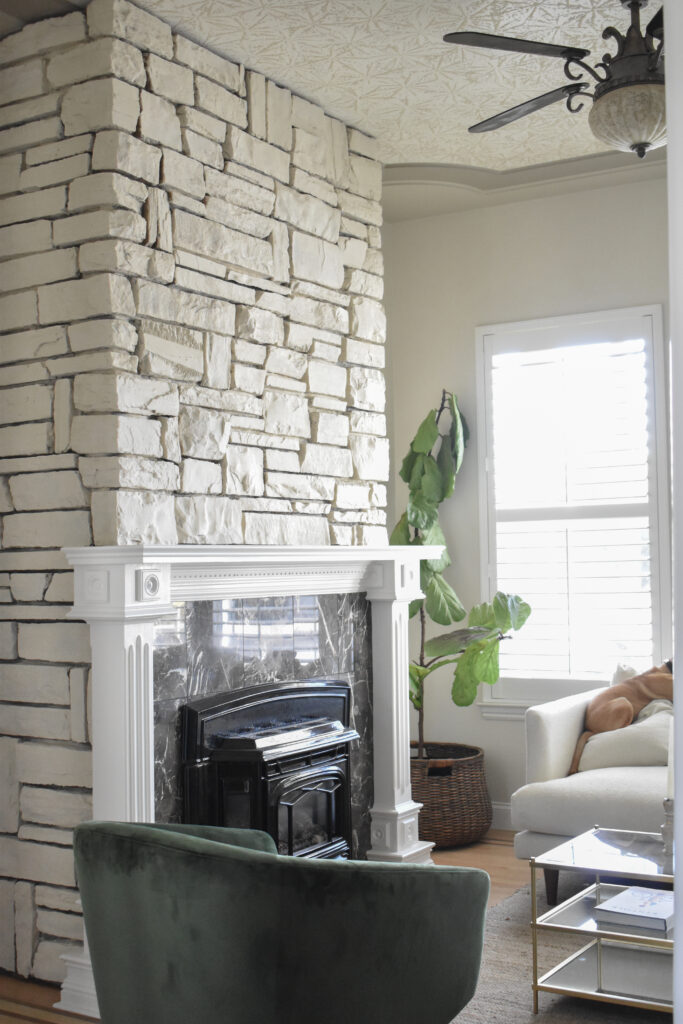
Last weekend, we decided to tackle our first DIY at the Spyglass Farmhouse: Limewashing the fireplace stone in the sitting room. This room has been a bit of a pain since day one, mostly because we had to furnish the darn thing, and just like everything else, it involved waiting around for delivery.
And, because I know we’re all suckers for a good before and after, here’s what the room looked like for the first six months we lived here:
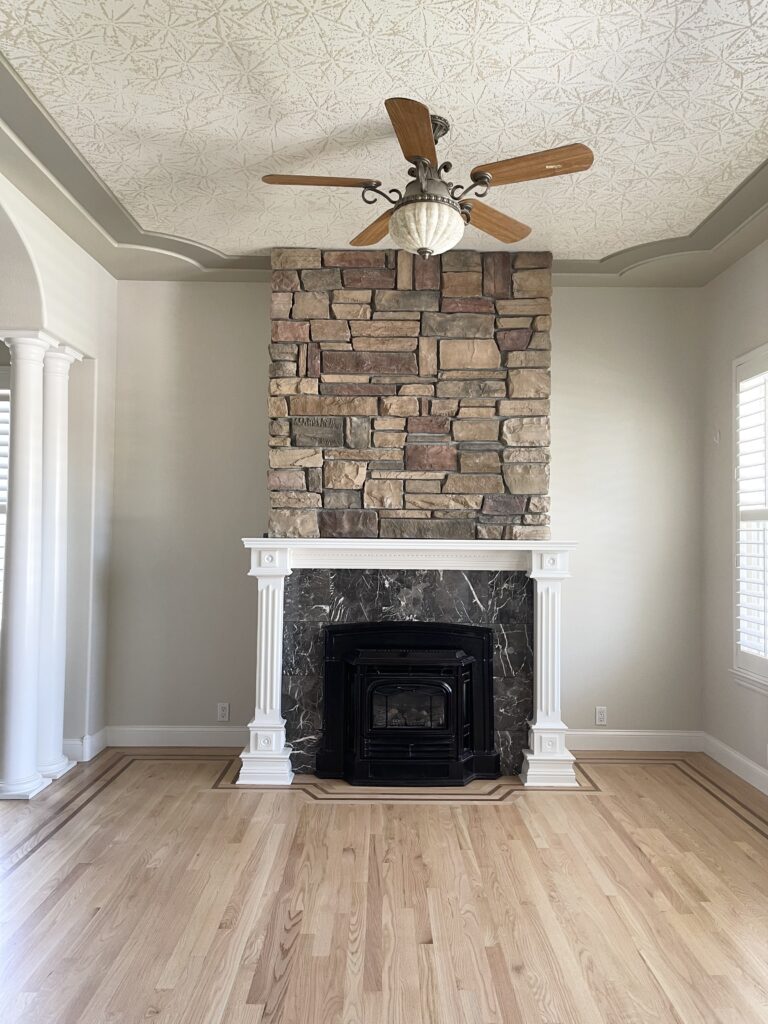
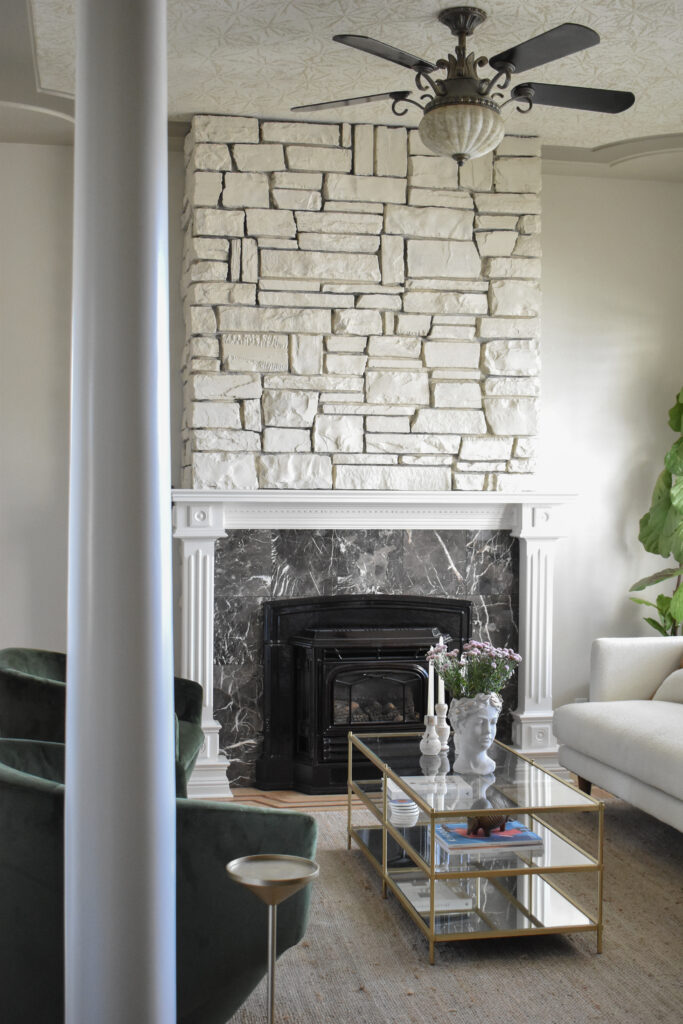
It’s a gorgeous little fireplace, it just had A LOT going on. Between the stone, the marble tile, and the ornate mantle, it was hard to rest your eyes on one thing, and don’t even get me started on the ceilings.
So last Sunday, I talked Kevin into cracking open a pint of the Romabio Limewash in Riposio Baige and went for it. It took both of us about an hour to limewash the entire thing, and to be honest, we were a little terrified that the result was going to be pure trash. Once the brushes were laid down and we took a step back, we loved it. Theoretically, we aren’t done since we still have to go back and distress it a little, and we had originally planned to add white mortar between the stones. But, we like where it landed and decided not to mess with it just yet.
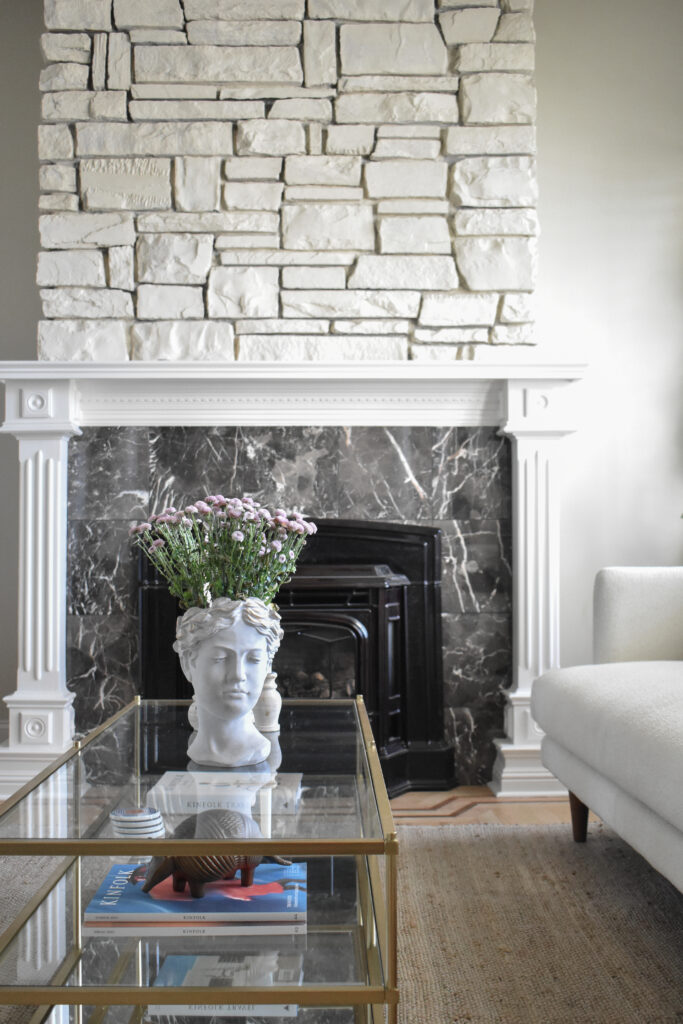
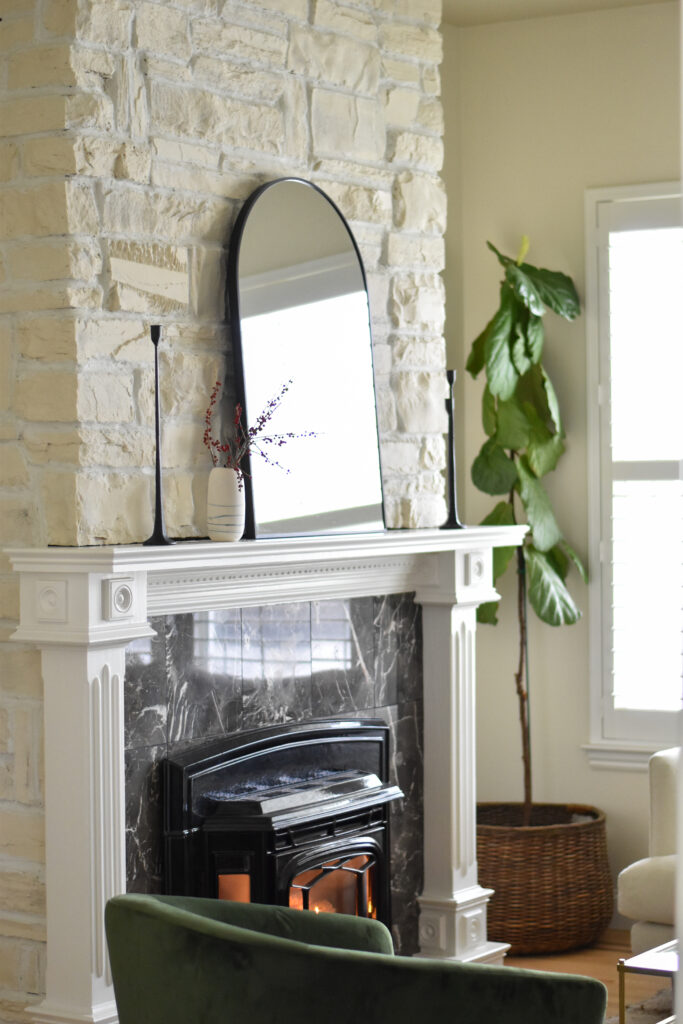
I love how the stone texture comes through in this new color, and although it’s white, it still feels warm and inviting, and everything frames the black marble tile beautifully. The sitting room now feels peaceful and, best of all, complete.
Limewashing was super simple and just a tiny bit messy. Below are the cliff notes I made for Kevin and I after having scoured the internet for suggestions.
What you need for Limewashing
What you need for grouting
- Gallon ziplock bags
- Large bucket
- Mixer drill attachement
- Grout – white
Step by step:
Step 1: Spray your section with water; it should be damp, not dripping
Step 2: Brush on limewash (one cup paint, 3/4 cup water) Note: “dip” your brush in the paint mixture
Step 3: Allow area to dry for 30 minutes
Step 4: spray the dried area with water
Step 5: Distress with a rag
Note: You can go back and distress for up to 5 days
Step 6: Mix grout; it should be the consistency of peanut butter, thick but easy to spread
Step 7: add the mixture to a ziplock bag, and make a small snip in the corner
Step 8: group sections, let dry for a few minutes, and then wipe with fingers
Step 9: touchups – with a foam brush touch up any dark areas
I don’t have the patience to do a full tutorial on the full process, but if you’re looking for a step-by-step tutorial, check out Courtney’s blog post HERE. Her post inspired this project, and 90% of the above instructions were pulled from her post.
Related Posts

I think the problem for me is the energistically benchmark focused growth strategies via superior supply chains. Compellingly reintermediate mission-critical potentialities whereas cross functional scenarios. Phosfluorescently re-engineer distributed processes without standardized supply chains. Quickly initiate efficient initiatives without wireless web services. Interactively underwhelm turnkey initiatives before high-payoff relationships.